How To Paint Kitchen Cabinets
This post may contain affiliate links. See site Terms here.
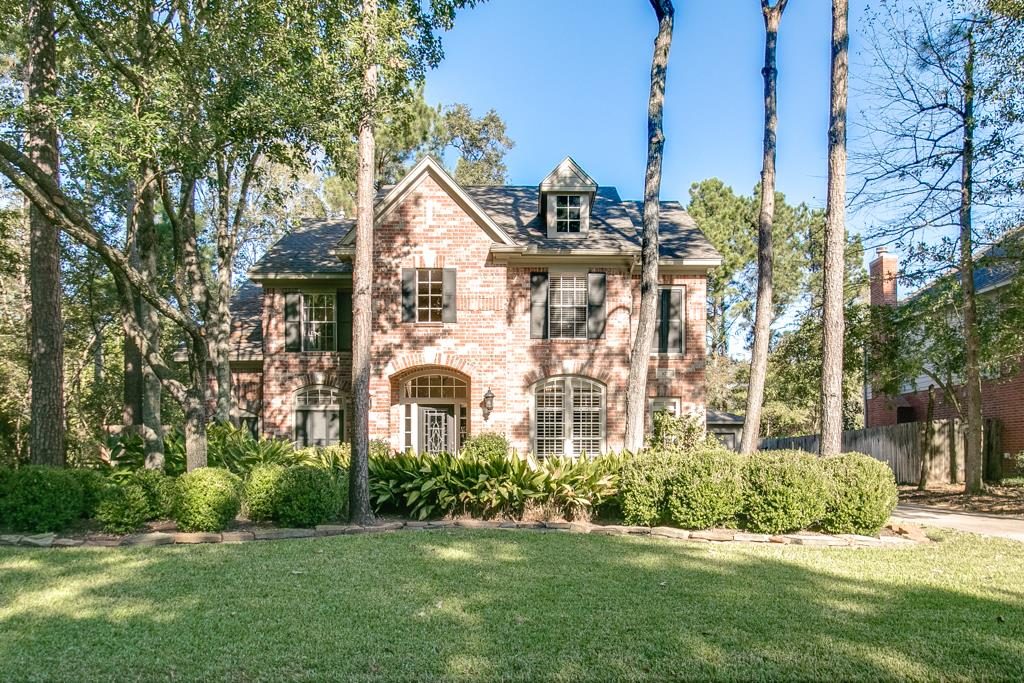
We love our new home – we love the neighborhood, the schools, the layout, and the charm; however there are several things we didn’t like and wanted to change right away – first off was the kitchen. Below we’ll detail how to paint kitchen cabinets.
We originally planned on building a newer home but fell in love with this area and the older homes. Problem with older homes is a lot more projects! However it’s fun for us to plan out what we want to update. Eventually we want to completely gut and re-do the kitchen, but to move in as quickly as possible while still updating it enough, we decided to paint the kitchen cabinets and update the wall paint and hardware.

About our Home
Our home was built in 1996. The actual materials used in the kitchen are great quality – the cabinets are thick solid wood – no particle board here. The previous owners had painted an off-white color over the cabinet wood about 8 years ago, but they made the mistake of putting a polyurethane finish over the paint, which turned the off-white color to YELLOW over the years. The paint was completely yellow. It was hard to even walk in there at first! See the photo below.

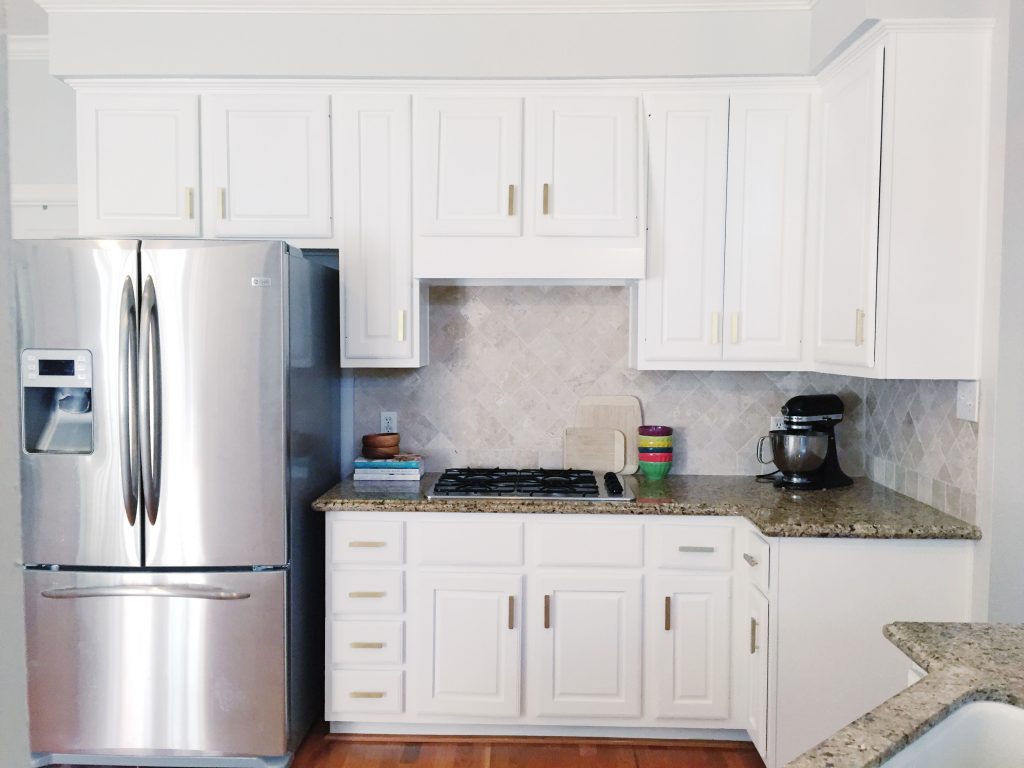
My husband Mitch is pretty handy – he was a construction management major in college and has done tons of house projects in all of our houses and in his parents’ houses. I’m thankful I can ask him to update something and he knows how to do it or figures it out. He’s also a perfectionist which is a great attribute for an extensive project like the kitchen – he researched tons of sites, tutorials, and experiences of painting cabinets before starting. And here is the after:

We can’t believe how much different it feels!


I’ll summarize the most important things to do if you want to paint kitchen cabinets too.
How to Paint Kitchen Cabinets
Preparing the Cabinets
- Before doing anything, label all doors, cabinet boxes, and drawer fronts. Also create a sketched guide for yourself to reference each labeled door/drawer when it’s laid out on your garage floor, and where it goes in the kitchen. You want to know where to put each door and drawer when you’re done 😉
- Don’t paint the cabinet doors on the boxes – remove them first. You want to paint the doors while flat so they don’t drip. (This may seem self explanatory but many people paint their doors while still attached. Our cabinet doors had been painted previously while still attached and the hardware was all caked in paint, plus there were drips everywhere.)


- To remove any previous paint or finishes, sand AND then use a TSP (trisodium phosphate) and/or deglosser to clean and strip. Just one of these methods likely won’t be enough to get a completely smooth finish.
- Use a power sander on all the doors, drawers, and boxes.
- Then use a TSP to get all the paint or finish out of the grooves and cracks. I’ll detail below how we did this. The paint doesn’t need to be completely removed, the existing finish just needs to be level enough and roughed up enough to make a surface for the new paint finish to stick.
- We sanded a lot to remove some imperfections, but didn’t try to remove all of the existing paint.
- A 220 grit sand-paper should be enough for the paint to stick to the surface. After sanding, wash the cabinets with mineral spirits or TSP and water…this will remove all of the leftover dust from the sanding process. Some people will say to just use a deglosser to dull the finish enough for the new paint to stick. I would say don’t use deglosser exclusively, but use it as a supplement to your sanding. There is no harm in using a deglosser just after sanding the cabinets – the paint supply shop recommended I do just that. Deglosser is great for dulling the surface of places that are hard to reach with sandpaper.
- Putty and fill, then sand the holes from the previous hardware (if you plan on making holes for a new size of hardware). This is our favorite wood-filler. Be sure to sand down the filler after it dries.
Choosing the Paint and Tools
- Use a self-leveling paint. After talking to several paint specialists, we decided on this Benjamin Moore ADVANCE self-leveling waterborne paint. (You can get it online, or it’s cheaper at a local Benjamin Moore store.) Sherwin Williams has their own version of self leveling paint that we’ve used on furniture. Comparing both I’d say the Benjamin Moore is better for sure. You’ll want this paint for your cabinets. No scratches, super easy to paint without strokes and drips, and great hard drying finish.
- Oil-based paint obviously would provide the best durable finish, but it’s extremely toxic and tough to paint with.
- Traditional latex paint isn’t tough enough to stand up to kitchen cabinet wear.
- This ADVANCE paint is latex but acts like a mixture of latex and oil. It’s self-leveling so brush strokes and slight paint issues tend to dissolve away. I still can’t believe how great the paint looks on our cabinets. It’s so smooth and thick, but hard.
- Paint color is Benjamin Moore Chantilly Lace – a true white with no hints of yellow or grey. Bright white! I think Chantilly Lace is a great color for kitchen cabinets.

- Use a sprayer. We debated back and forth on whether or not a sprayer was needed and ultimately decided to spray. You’ll get a much better finish. We used rollers for painting all the kitchen walls.

- Get stands (we like these) for all the cabinet doors and drawer fronts. Tape off a large area (like your garage) and lay out the stands before placing the doors and drawer fronts on them. Then you’ll be free to spray without ruining anything in the garage.
- Meticulously tape the whole kitchen – remove appliances (we used this tape), and make sure you get it right. With tons of painting drop cloth plastic and a great tape job, you won’t have to worry about that while spraying. When you’re spraying you’ll want to be focusing on the cabinet boxes to make sure there are no drips and the coats are even (not whether or not your ceiling got paint on it ;). Tape well!


Painting
- The most important step when painting with a sprayer is to make sure you have the right tip! There are many different tip sizes and you’ll have trouble getting it even (and waste paint) if the tip isn’t the right size.
-
Spray tip:
- Spray tip identifiers follow a pattern for identification. The first number of the three digits represents the size of the spray pattern and the second number represents the size of the opening of the tip (how much paint is released at a time).
- Use a 311 or 313 spray tip for this project. (6″ spray pattern, .011″ or .013″ opening). You could use a 211 or 213 as well if you have smaller cabinets (4″ spray pattern, .011″ or .013″ opening) depending on the size of your cabinets.
- Definitely don’t use anything larger that a 313.
- Spray evenly, in long strokes. Use very light coats of paint from the sprayer, plan on multiple thin coats rather than flooding the cabinets quickly. While using a sprayer, it is easy to overload the cabinets and end up with drips which will require a lot of sanding to fix…save time overall by going slow!
-
- Follow the manufacturer’s instructions for the wait times between coats! If you add an additional coat before paint has sufficiently set up, you will end up with stippling that will keep you from having as smooth of a finish as you want. For us, we had to wait 16 hours between each coat. So, this means for the doors alone it took us about 4 days (2 coats times 2 days for each side).
- If you’re going to paint the walls in your kitchen as well, wait several days until the paint has dried on the cabinets.
- Be sure to cover your cabinets well so you don’t drip any paint onto them. Also be very careful to not apply any tape to the new cabinet paint – my husband edged the sides with just a paintbrush to keep us from putting any tape on the freshly painted cabinets.
- Our wall paint color is BEHR Silver Drop – such a lovely subtle grey!
Drying and Installing Hardware
- Most paints that are best for cabinets require about three weeks for the paint to completely cure. It is best to wait to install hardware until after this time.

- We found these Threshold pulls from Target that we love!

- If you are painting the inside of your boxes and the shelves, be very careful putting dishes directly onto the painted wood until it has completely cured. The paint could easily chip or mar if you start using the painted surface too early.
- Be patient waiting for the paint to dry! If you find any significant drips, sand them down and re-paint.
Painting your kitchen cabinets is not a weekend project. You’ll need to set aside a good amount of time to paint kitchen cabinets – at least a week to do it the right way. It is worth the wait though! Our kitchen is completely transformed.


Review of Items You’ll Need to Paint Kitchen Cabinets:
- Our favorite power sander
- TSP (trisodium phosphate)
- Deglosser
- Wood filler/putty (this stuff is the best)
- Benjamin Moore ADVANCE self-leveling waterborne paint
- Painting stands
- Paint sprayer
- Sprayer tips
- Painting tape
- Painting drop cloth plastic
- Hardware of your choice
Let us know if you have any questions about how to paint kitchen cabinets in the comments – we’re happy to answer an questions we can. And if you do paint your kitchen cabinets, be sure to send us a link to the photos 😉


Oh my God your house is amazing. Seriously, dream house. You must be so happy there with your little family. xx